vSphere 6.5 to 7.0 – 1ère Partie – VCSA

vSphere 7 est disponible depuis le 8 Avril 2020, le besoin de relancer le vLAB afin de m’exercer sur Veeam m’a également donné l’envie d’upgrade mon lab 6.5 en 7.0. J’en profite donc pour vous partager mon process de migration et mon expérience. Enjoy!

A noté qu’il est possible d’upgrade vers vSphere 7.0 que depuis la 6.5 ou 6.7.

Tout d’abord, un KB très intéressant que vous pouvez consulter à cette URL : https://kb.vmware.com/s/article/78221 – ce KB vous indique le séquencement dans votre process de migration avec l’ensemble des produits VMware (vRO, vRA, SRM, NSX, VCSA..)

Comme à chaque upgrade, il est important de vérifier plusieurs points avant de vous lancer :

  • La compatibilité matériel avec vSphere 7.0.
  • Le support de vSphere 7.0 par vos outils (supervision, sauvegarde, réplication..).
  • Plus généralement l’ensemble des dépendances avec votre infrastructure vSphere.

Aussi, pensez à effectuer une sauvegarde de votre vCenter/PSC (Snapshot, logiciel de backup, backup intégré dans VAMI https//ipdevotreVCSA:5480)

Dans notre cas nous allons mettre à jour le VCSA dans un 1er temps puis les ESXi ensuite (dans un 2éme article)

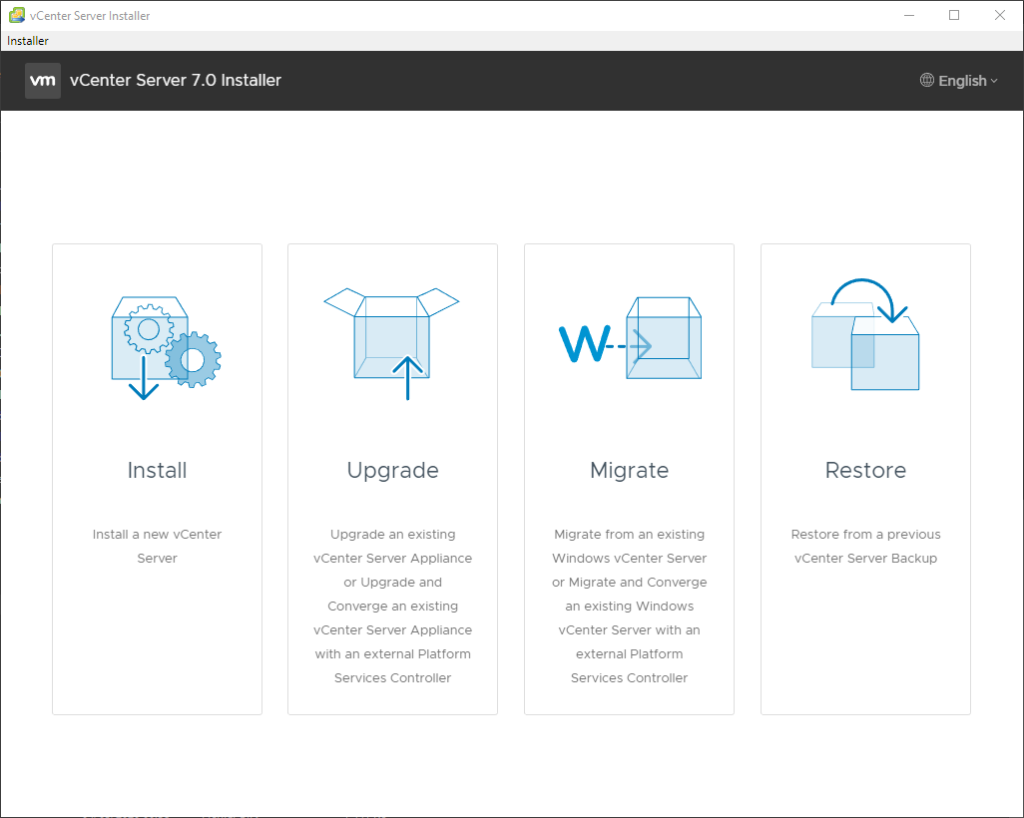
  • Depuis un serveur ou poste d’administration, monter l’iso VCSA 7.0 et lancer l’installer présent dans x:\vcsa-ui-installer\win32
  • Choisir Upgrade
vCenter Server Installer 
Installer 
vCenter Server 7.0 Installer 
Install 
Install a new vCenter 
Server 
Upgrade 
upgrade an existing 
vCenter Server Appliance 
or upgrade and 
Converge an existing 
vCenter Server Appliance 
with an external Platform 
Services Controller 
Migrate 
Migrate from an existing 
Windows vCenter Server 
or Migrate and Converge 
an existing Windows 
vCenter Server with an 
external Platform 
Services Controller 
@ English v 
Restore 
Restore from a previous 
vCenter Sewer Backup
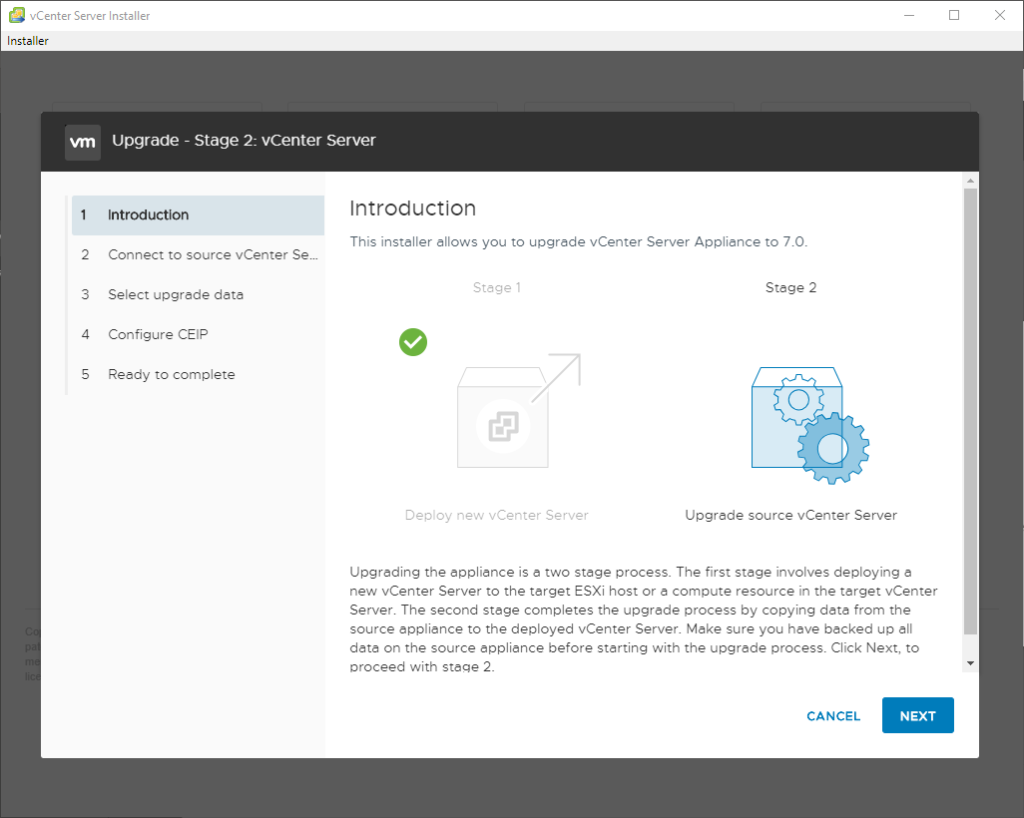
  • L’assistant vous indique qu’avec vSphere 7 il n’y a plus de PSC externe. Tout est maintenant embedded. Il est indiqué également le process de migration et son fonctionnement en 2 étapes :
  • Etape 1 : Déploiement de la nouvelle VCSA sur l’ESXi Cible.
  • Etape 2 : Copie des données de l’ancienne VCSA vers la nouvelle.

Cliquer sur Next

vCenter Server Installer 
Installer 
Upgrade - Stage 1: Deploy vCenter Server 
1 Introduction 
2 End user license agreement 
3 Connect to source appliance 
4 vCenter Server deployment target 
5 Set up target vCenter Server VM 
6 Select deployment size 
7 Select datastore 
8 Configure network settings 
9 Ready to complete stage 1 
Introduction 
vCenter Server with an external Platform Services Controller will be 
converged to a vCenter Server with an embedded Platform Services 
Controller. 
This installer allows you to upgrade vCenter Server Appliance to 7.0. 
Learn more 
Stage 2 
Stage 1 
Deploy vCenter Server 
Cpgrade source appliance 
upgrading the appliance is a two stage process. The first stage involves deploying a new 
vCenter Server to the target ESXi host or a compute resource in the target vCenter Server. The 
second stage completes the upgrade process by copying data from the source appliance to 
the deployed vCenter Server. Make sure you have backed up all data on the source appliance 
before starting with the upgrade process Click Next, to proceed with stage 1. 
CANCEL 
NEXT
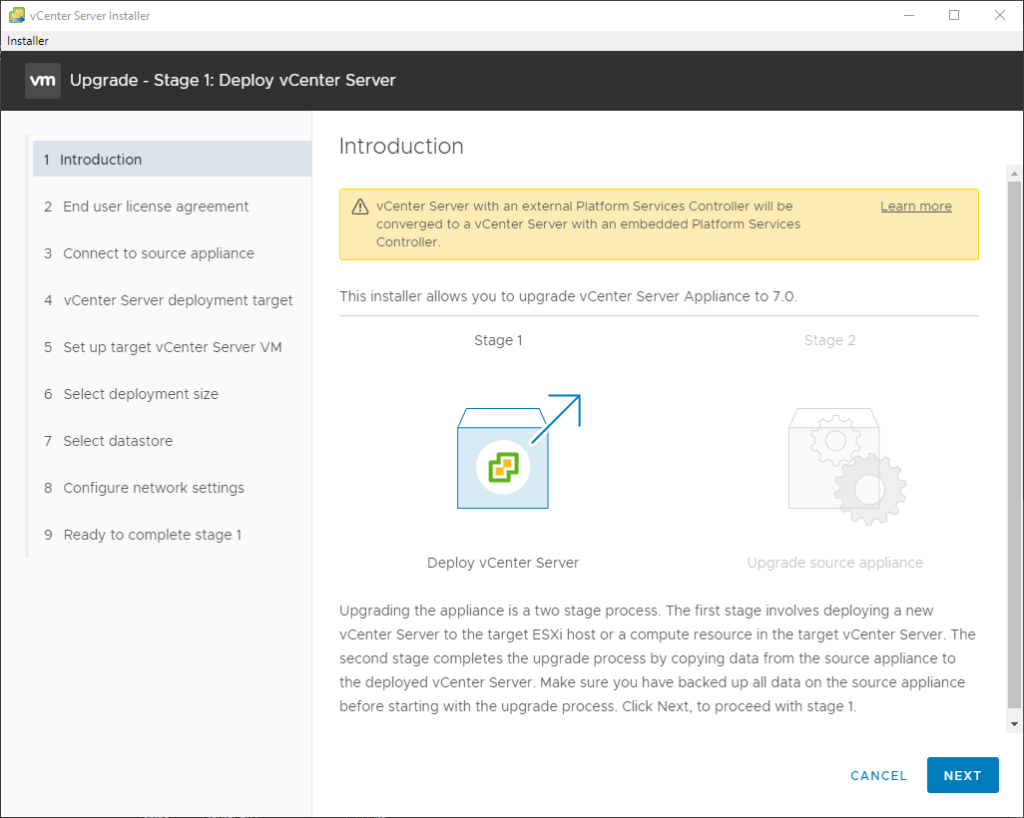
  • On accepte les licence agreement puis Next
vCenter Server Installer 
Installer 
Upgrade - Stage 1: Deploy vCenter Server 
2 
3 
4 
5 
6 
7 
8 
9 
Introduction 
End user license agreement 
Connect to source appliance 
vCenter Server deployment target 
Set up target vCenter Server VM 
Select deployment size 
Select datastore 
Configure network settings 
Ready to complete stage 1 
End user license agreement 
Read and accept the following license agreement. 
VMWARE END USER LICENSE AGREEMENT 
PLEASE NOTE THAT THE TERMS OF THIS END USER LICENSE AGREEMENT SHALL 
GOVERN YOUR USE OF THE SOFTWARE, REGARDLESS OF ANY TERMS THAT MAY 
APPEAR DURING THE INSTALLATION OF THE SOFTWARE. 
IMPORTANT-READ CAREFULLY: ay DOWNLOADING, INSTALLING, OR USING THE 
SOFTWARE, YOU (THE INDIVIDUAL OR LEGAL ENTITY) AGREE TO BE BOUND BY THE 
TERMS OF THIS END USER LICENSE AGREEMENT ("EULA"). IF YOU DO NOT AGREE TO THE 
TERMS OF THIS EULA, YOU MUST NOT DOWNLOAD, INSTALL, OR USE THE SOFTWARE, 
AND YOU MUST DELETE OR RETURN THE UNUSED SOFTWARE TO THE VENDOR FROM 
WHICH YOU ACQUIRED IT WITHIN THIRTY (30) DAYS AND REQUEST A REFUND OF THE 
LICENSE FEE, IF ANY, THAT YOU PAID FOR THE SOFTWARE. 
•J accept the terms of the license agreement. 
CANCEL 
BACK 
NEXT
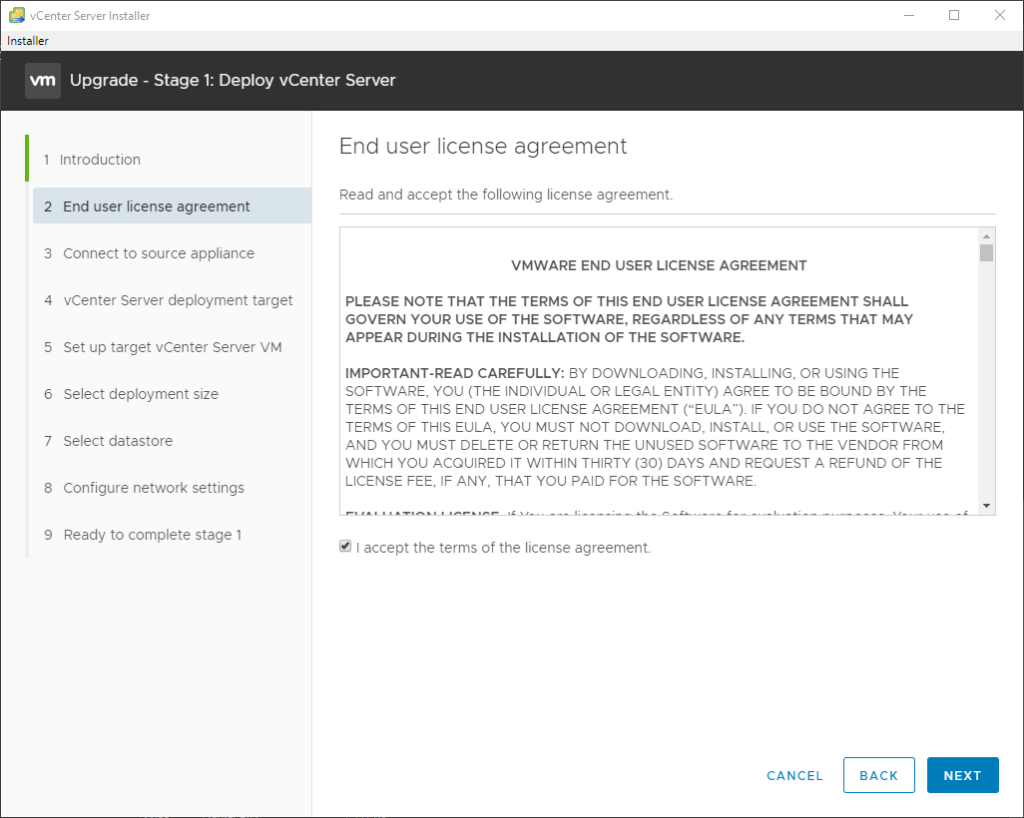
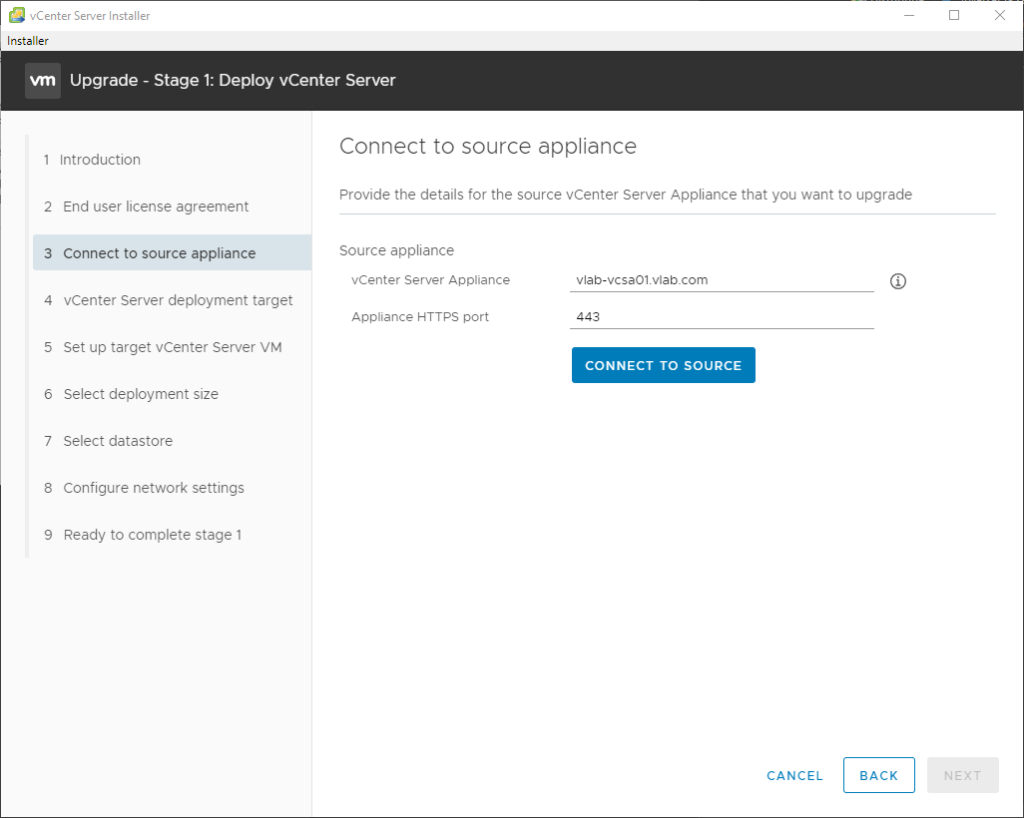
  • L’assistant nous demande de saisir les informations concernant la VCSA source que nous avons en 6.5 ainsi que l’hôte ESXi où est située l’appliance d’origine (Il est donc préférable le temps du process de configurer DRS afin qu’il ne soit pas en automatique)
vCenter Server Installer 
Installer 
Upgrade - Stage 1: Deploy vCenter Server 
2 
3 
4 
5 
6 
7 
8 
9 
Introduction 
End user license agreement 
Connect to source appliance 
vCenter Server deployment target 
Set up target vCenter Server VM 
Select deployment size 
Select datastore 
Configure network settings 
Ready to complete stage 1 
Connect to source appliance 
Provide the details for the source vCenter Server Appliance that you want to upgrade 
Source appliance 
vCenter Server Appliance 
Appliance HTTPS port 
SSO User name 
SSO Password 
Appliance (OS) root password 
vlab-vcsa01_vlab.com 
administrator@vlab-vsphere]ocal 
ESXi host or vCenter Server that manages the source appliance 
ESXi host or vCenter Sewer 
name 
HTTps port 
User name 
Password 
vlab-esx01_vlabcom 
root 
CANCEL 
BACK 
NEXT
  • Connexion à l’appliance VCSA source
vCenter Server Installer 
Installer 
Upgrade - Stage 1: Deploy vCenter Server 
1 Introduction 
2 End user license agreement 
3 Connect to source appliance 
4 vCenter Server deployment target 
5 Set up target vCenter Server VM 
6 Select deployment size 
7 Select datastore 
8 Configure network settings 
9 Ready to complete stage 1 
Connect to source appliance 
Provide the details for the source vCenter Server Appliance that you want to upgrade 
Source appliance 
vCenter Server Appliance 
Appliance HTTPS port 
vlatFÆsa01.vIab.com 
443 
CONNECT TO SOURCE 
CANCEL 
BACK
  • Cliquer sur Yes pour accepter
vCenter Server Installer 
Installer 
Certificate Warning 
If an untrusted SSL certificate is installed on vlab-vcsa01.vlab.com or vlab- 
esx01_vIab.com, secure communication cannot be guaranteed. Depending on 
your security policy, this issue might not represent a security concern. 
The SHAI thumbprints of the certificates are: 
and 
To accept and continue, click Yes 
YES
  • Nous indiquons l’ESXi où nous souhaitons que la VCSA 7 devra être déployée. Dans mon lab j’ai spécifié un ESXi différent pour équilibrer la charge. Puis cliquer sur Next.
vCenter Server Installer 
Installer 
Upgrade - Stage 1: Deploy vCenter Server 
1 Introduction 
2 End user license agreement 
3 Connect to source appliance 
4 vCenter Server deployment target 
5 Set up target vCenter Server VM 
6 Select deployment size 
7 Select datastore 
8 Configure network settings 
9 Ready to complete stage 1 
vCenter Server deployment target 
Specify the vCenter Server deployment target settings The target is the ESXi host or vCenter 
Server instance on which the vCenter Server will be deployed. 
ESXi host or vCenter Server 
name 
H-rrps port 
user name 
Password 
vlab-esx02.vlab.com 
443 
root 
CANCEL 
BACK 
NEXT
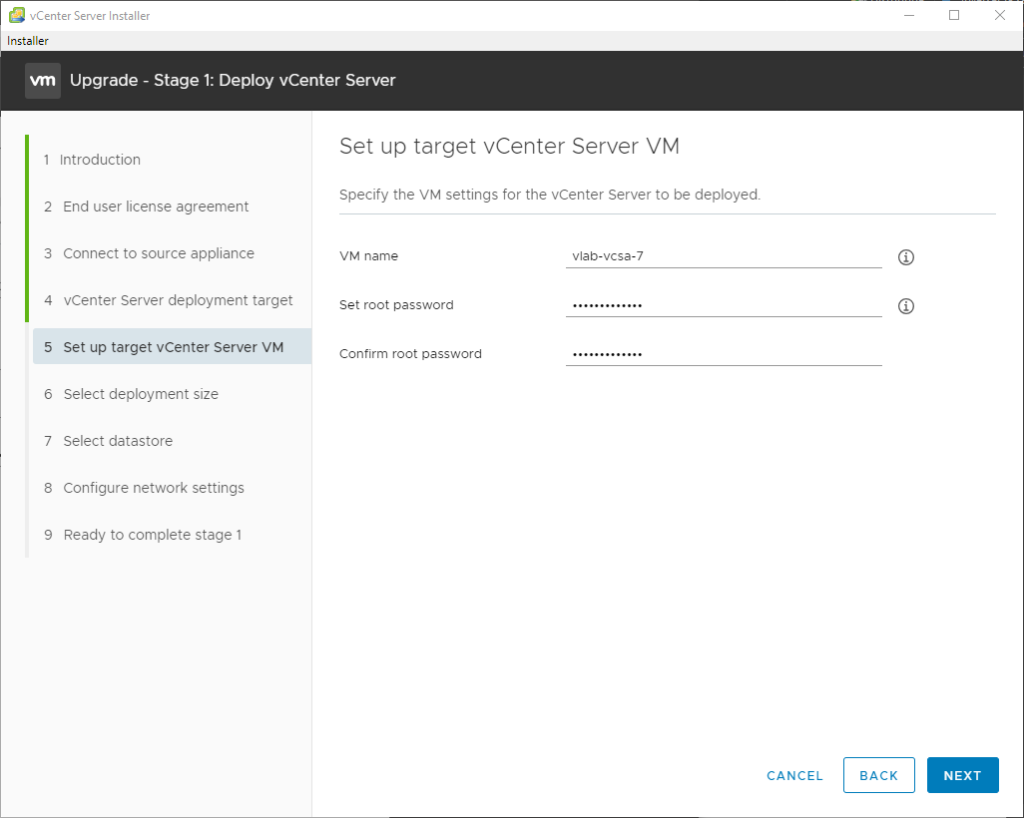
  • Nous devons indiquer le nom de la VM tel qu’elle apparaîtra sur notre ESXi/vCenter ainsi que le mot de passe root que l’on souhaite. Cliquer ensuite sur Next
vCenter Server Installer 
Installer 
Upgrade - Stage 1: Deploy vCenter Server 
1 Introduction 
2 End user license agreement 
3 Connect to source appliance 
4 vCenter Server deployment target 
5 Set up target vCenter Server VM 
6 Select deployment size 
7 Select datastore 
8 Configure network settings 
9 Ready to complete stage 1 
Set up target vCenter Server VM 
Specify the VM settings for the vCenter Server to be deployed. 
VM name 
Set root password 
Confirm root password 
CANCEL 
BACK 
NEXT
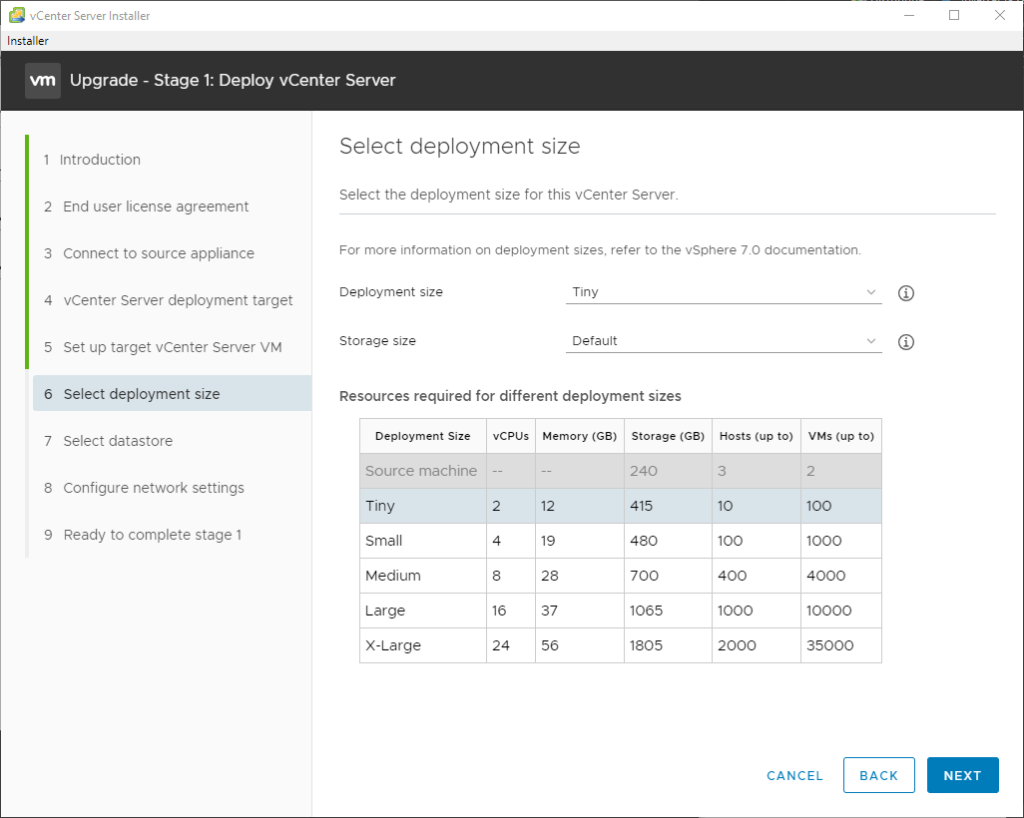
  • Choisir la taille de notre déploiement, j’ai besoin d’une Tiny pour mon vlab mais cela sera en fonction de votre infrastructure/besoin.
vCenter Server Installer 
Installer 
Upgrade - Stage 1: Deploy vCenter Server 
2 
3 
4 
5 
6 
7 
8 
9 
Introduction 
End user license agreement 
Connect to source appliance 
vCenter Server deployment target 
Set up target vCenter Server VM 
Select deployment size 
Select datastore 
Configure network settings 
Ready to complete stage 1 
Select deployment size 
Select the deployment size for this vCenter Server. 
For more information on deployment sizes, refer to the vSphere 70 documentation. 
Deployment size 
Storage size 
Default 
Resources required for different deployment sizes 
Deployment Size 
vcpus Memory (GB) storage (GB) 
Source machine 
Tiny 
Small 
Medium 
Large 
X-Large 
2 
4 
8 
16 
24 
12 
19 
28 
37 
56 
240 
415 
480 
700 
1065 
1805 
Hosts (up to) 
3 
10 
100 
400 
1000 
2000 
VMs (up to) 
2 
100 
1000 
4000 
10000 
35000 
CANCEL 
BACK 
NEXT
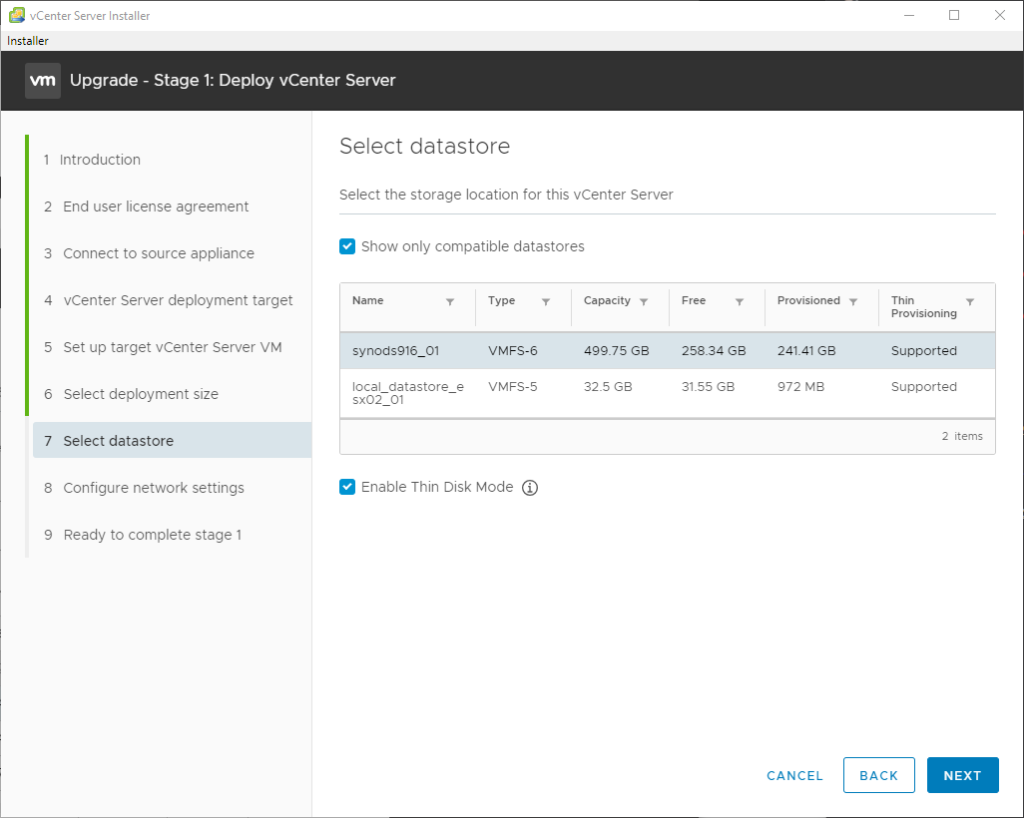
  • Sélectionner le datastore où vous souhaitez que la VCSA soit déployée. Dans mon lab je l’ai déployée sur mon datastore positionné sur mon Synology DS916+. J’ai également sélectionné un provisionning en thin disk mode.
vCenter Server Installer 
Installer 
Upgrade - Stage 1: Deploy vCenter Server 
2 
3 
4 
5 
6 
7 
8 
9 
Introduction 
End user license agreement 
Connect to source appliance 
vCenter Server deployment target 
Set up target vCenter Server VM 
Select deployment size 
Select datastore 
Configure network settings 
Ready to complete stage 1 
Select datastore 
Select the storage location for this vCenter Server 
Show only compatible datastores 
Name 
synods916_01 
local datastore 
sx02 01 
e 
Type 
VMFS-6 
VMFS-5 
Capacity 
499.75 G8 
32.5 
258.34 
31.55 GB 
Provisioned •r 
241.41 
972 MB 
CANCEL 
Thin 
Provisioning 
Supported 
Supported 
Enable Thin Disk Mode @ 
BACK 
2 items 
NEXT
  • Configurez maintenant le réseau de votre VCSA puis cliquez sur Next
vCenter Server Installer 
Installer 
Upgrade - Stage 1: Deploy vCenter Server 
2 
3 
4 
5 
6 
7 
8 
9 
Introduction 
End user license agreement 
Connect to source appliance 
vCenter Server deployment target 
Set up target vCenter Server VM 
Select deployment size 
Select datastore 
Configure network settings 
Ready to complete stage 1 
Configure network settings 
Configure network settings for this vCenter Server 
Network 
Temporary network settings 
Ip version 
IP assignment 
Temporal"/ IP address 
Subnet mask or prefix length 
Default gateway 
DNS servers 
VM Network 
static 
192 1681.83 
255255.2550 
192 
192 
CANCEL 
BACK 
NEXT
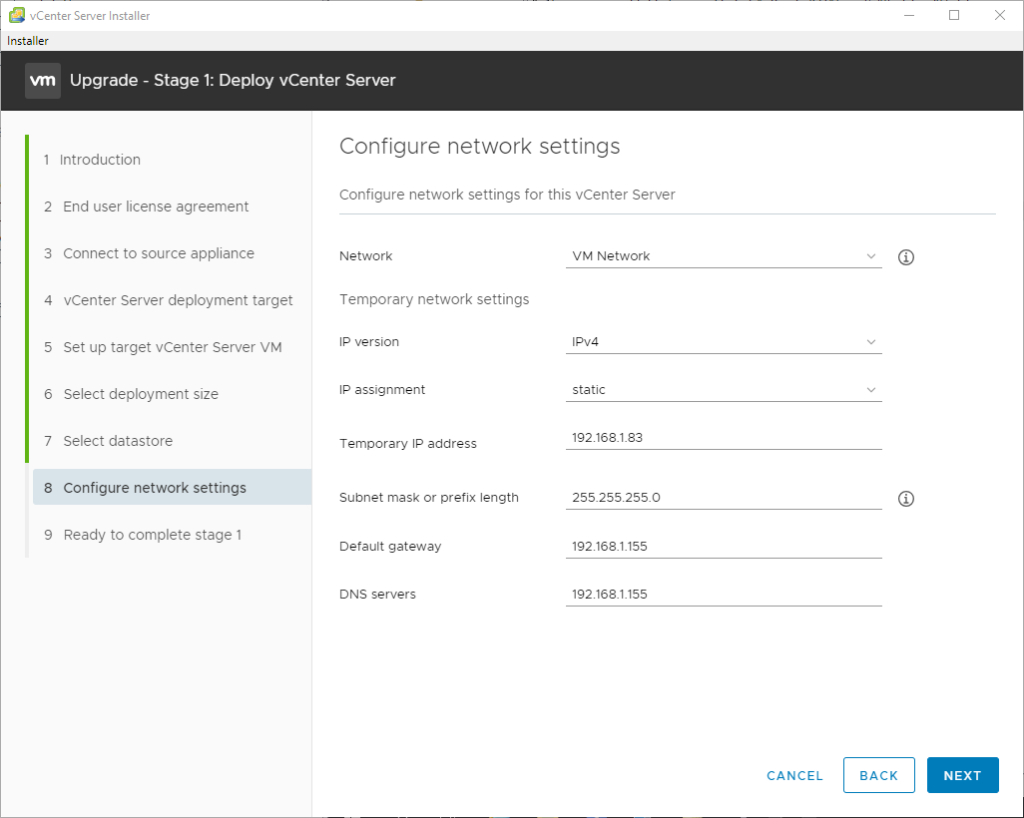
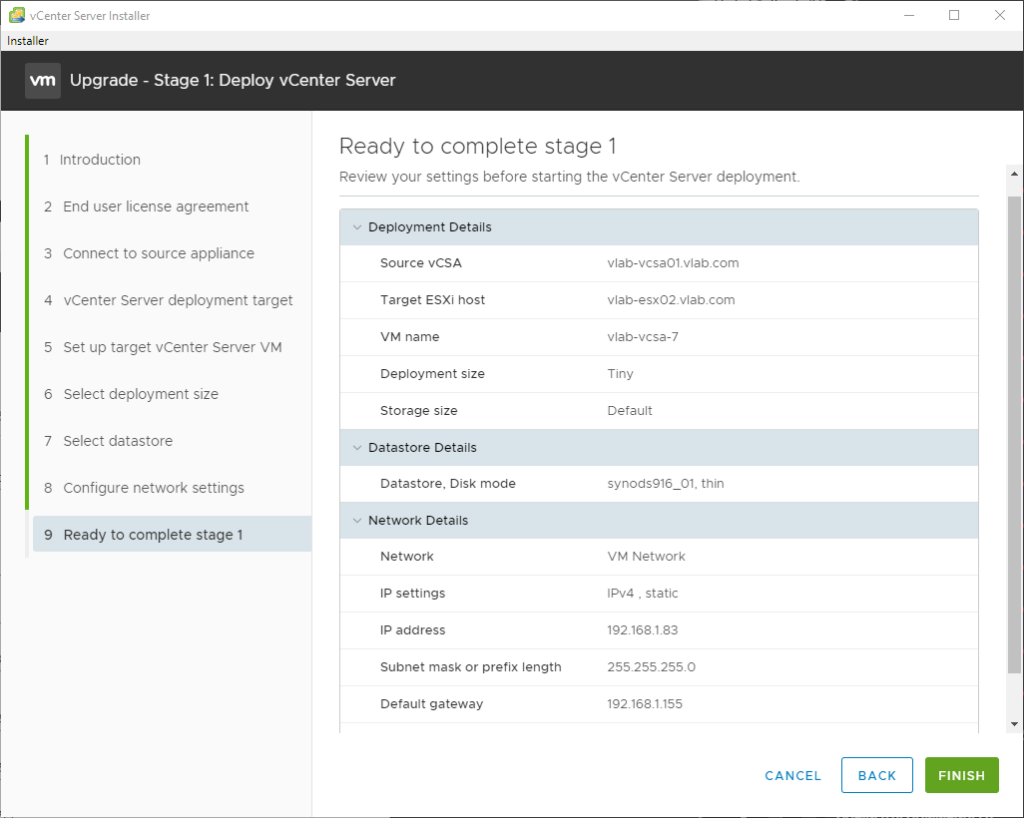
  • Le résumé de votre upgrade s’affiche, vérifiez l’ensemble des points et cliquez sur Next
vCenter Server Installer 
Installer 
Upgrade - Stage 1: Deploy vCenter Server 
2 
3 
4 
5 
6 
7 
8 
9 
Introduction 
End user license agreement 
Connect to source appliance 
vCenter Server deployment target 
Set up target vCenter Server VM 
Select deployment size 
Select datastore 
Configure network settings 
Ready to complete stage 1 
Review your settings before starting the vCenter Server deployment. 
Deployment Details 
source vCSA 
Target ESXi host 
VM name 
Deployment size 
Storage size 
Datastore Details 
Datastore, Disk mode 
Network Details 
Network 
IP settings 
IP address 
Subnet mask or prefix length 
Default gateway 
vlab-vcsa01_vlab.com 
vlab-esx02_vlabcom 
vlab-vcsa-7 
Tiny 
Default 
synodsg16_01. thin 
VM Network 
, static 
192.168183 
255255_2550 
192.1681155 
CANCEL 
BACK 
FINISH
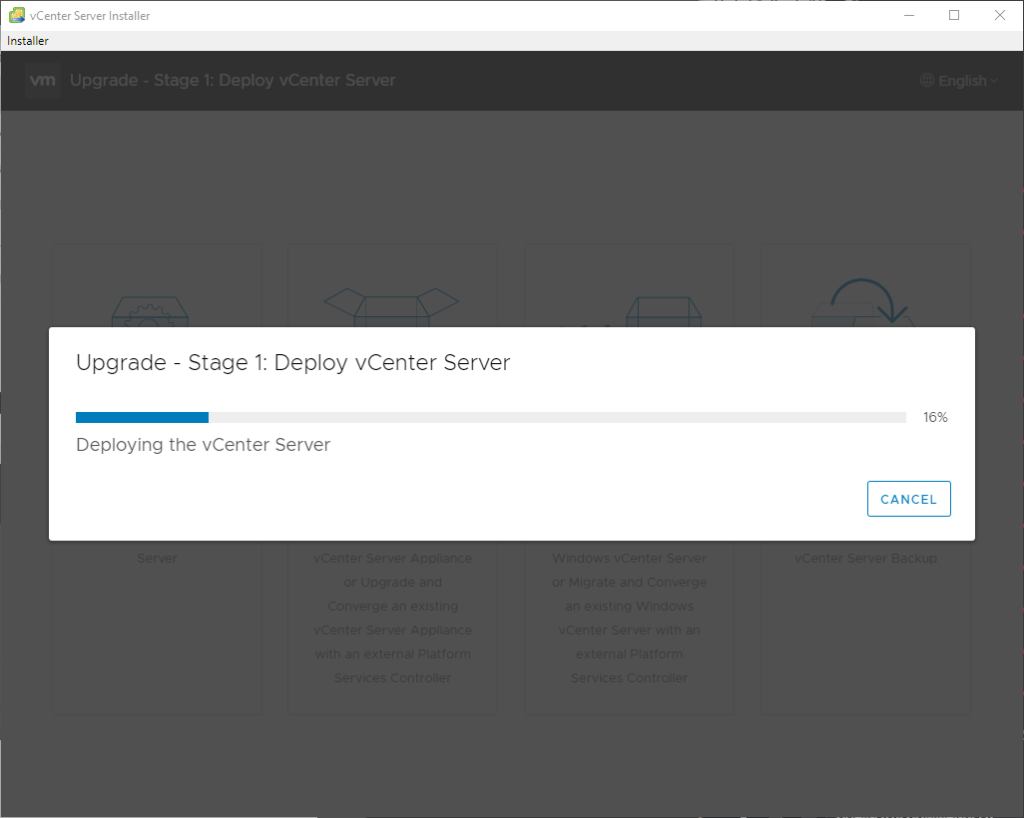
  • L’ugprade se lance. L’étape 1 consiste dans le déploiement de la VCSA 7 sur votre infrastructure.
vCenter Server Installer 
Installer 
Upgrade Stage 1: Deploy vCenter Server 
Deploying the vCenter Server 
16% 
CANCEL
  • Une fois l’étape 1 terminée, vous pouvez cliquer sur Continue
vCenter Server Installer 
Installer 
Upgrade Stage 1: Deploy vCenter Server 
@ You have successfully deployed the vCenter Server. 
To proceed with stage 2 of the deployment process, vCenter Server setup, click Continue. 
If you exit, you can continue with the vCenter Server setup at any time by logging in to the vCenter Server Management Interface 
https://192.168_1.83:5480/ 
CANCEL 
CLOSE 
CONTINUE
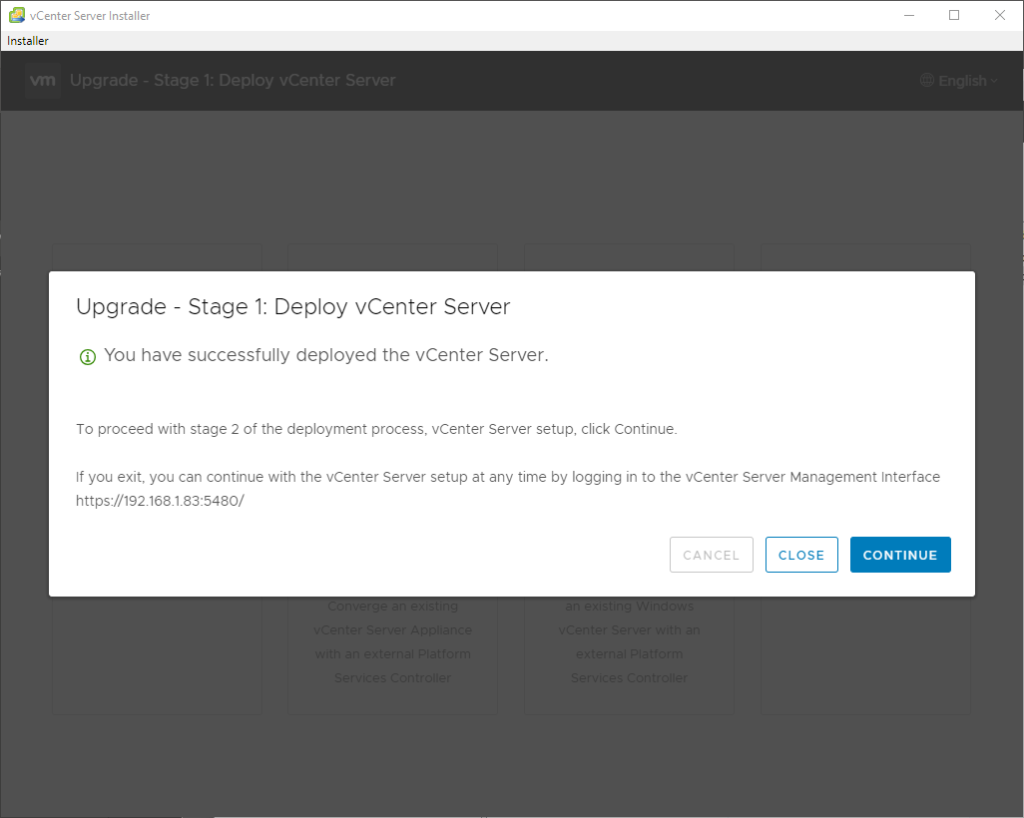
  • L’assistant pour l’étape 2 apparaît afin de vous guider dans la suite. Cliquez sur Next
vCenter Server Installer 
Installer 
2 
3 
4 
S 
Upgrade - Stage 2: vCenter Server 
Introduction 
Connect to source vCenter Sem 
Select upgrede data 
Configure CEIP 
Reedy to complete 
Introduction 
This installer allows you to upgrade vCenter Server Appliance to 7.0. 
Stage 
Deploy new vCenter Server 
Stege 2 
O 
Upgrede source vCenter Server 
Upgreding the eppliance is e two stage process. The first stage involves deploying e 
new vCenter Server to the target ESXi host or a compute resource in the target vCenter 
Server. The second stage completes the upgrede process by copying data from the 
source appliance to the deployed vCenter Server. Make sure you have backed up all 
data on the source epplience before starting with the upgrade pruess. Click Next, to 
oroceed with stage 2. 
CANCEL 
NEXT
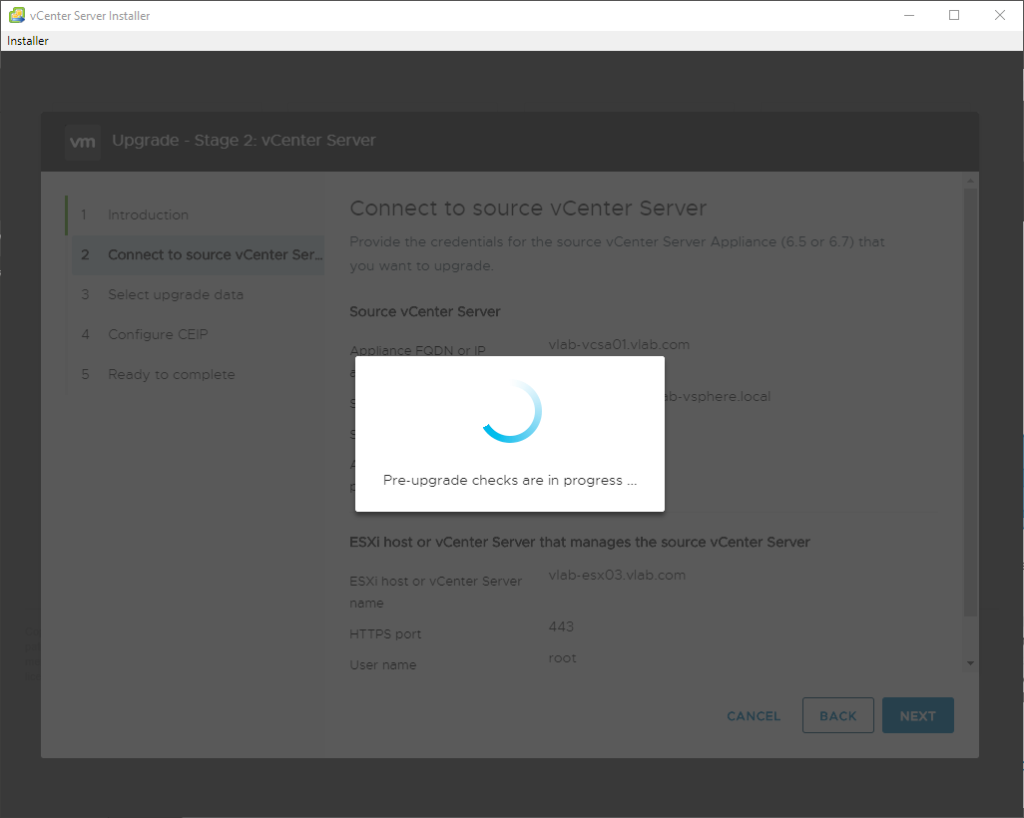
  • Un pre-check est effectué et vous informera d’ailleurs sur la nécessité de changer votre configuration de DRS durant le process.
vCenter Server Installer 
Installer 
vrn 
upgrade - Stage 2: vCenter Server 
Connect to source vCenter Server 
d 
Connect to source vCenter Ser 
Source vCenter Server 
:eec 
Pre-upgrade checks are in progress 
ESXi host or vCenter Server that manages the source vCenter Server 
ESXi host c Center Sen. 
*TTPS 
'ser nam* 
:ANCEL 
BACK
vCenter Server Installer 
Installer 
vrn 
upgrade - Stage 2: vCenter Server 
Pre-upgrade check result 
sele 
:eec 
Warning 
Resolution 
Warning 
Description 
This ESXi host [vIab-esx03vlab.com] is managed by 
center Server (192.168.1_9S). 
Make sure the cluster where this ESXi host resides is 
not set to Fully Automated DRS for the duretion of the 
upgrede process. 
Files that cennot be used with Update Meneger 7.0_0 
will not be copied from the source. These files include 
VM guest OS patch baselines, host upgrade baselines 
and files, and ESXi 6.0 end lower version host patches 
baselines. 
Files that cennot be used with Update Meneger 7.0_0 
will not be copied from the source. These files include 
CLOSE 
:ANCEL 
BACK
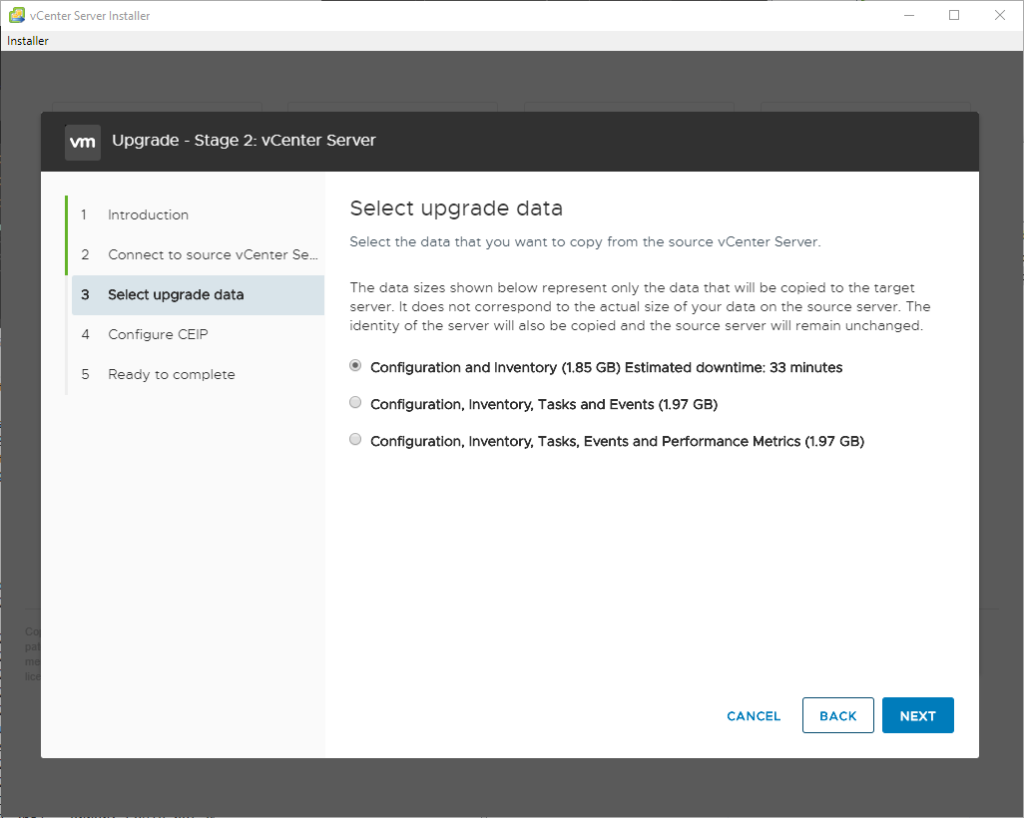
  • L’assistant vous demande quels données vous souhaitez récupérer. Dans mon cas j’ai choisis seulement la configuration et l’inventaire et je n’ai pas récupéré les logs/métriques de performances.
vCenter Server Installer 
Installer 
2 
3 
4 
S 
Upgrade - Stage 2: vCenter Server 
Select upgrade data 
Introduction 
Select the data thet you went to copy from the source vCenter Server. 
Connect to source vCenter Sem 
The dete sizes shown below represent only the date that will be copied to the target 
Select upgrade data 
server. It does not correspond to the ectuel size of your deta on the source server. The 
identity of the server will also be copied and the source server will remain unchanged. 
Configure CEIP 
Configuration and Inventory (1.85 GB) Estimated downtime: 33 minutes 
Reedy to complete 
O 
Configuration. Inventory. Tasks and Events (1.97 GS) 
O 
Configuration. Inventory. Tasks. Events and Performance Metrics (1.97 GB) 
CANCEL 
BACK 
NEXT
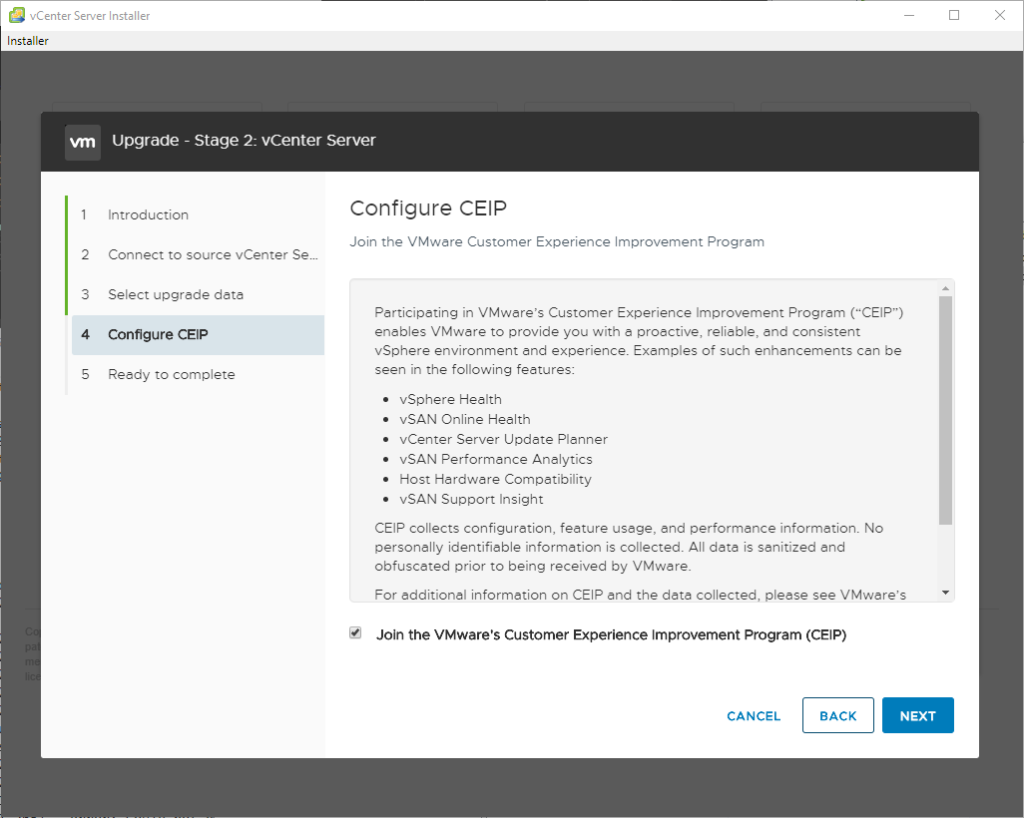
  • Il est possible de rejoindre le CEIP qui permet d’améliorer le produit en émettant des données à VMware.
vCenter Server Installer 
Installer 
2 
3 
4 
S 
Upgrade - Stage 2: vCenter Server 
Introduction 
Connect to source vCenter Sem 
Select upgrede data 
configure CEP 
Reedy to complete 
configure CEP 
Join the VMware Customer Experience Improvement Program 
Participating in VMwere's Customer Experience Improvement Progrem ("CEIP") 
enables VMware to provide you with e proactive, reliable, and consistent 
vSphere environment and experience. Exemples of such enhancements cen be 
seen in the following features: 
vSphere Health 
vSAN Online Heelth 
vCenter Server Updete Planner 
vSAN Performance Analytics 
Host Hardware Competibility 
vSAN Support Insight 
CEIP collects configuration, feature usage, end performance information. No 
personelly identifiable information is collected. All data is sanitized end 
obfuscated prior to being received by VMware_ 
For edditional information on CEIP and the data collected, please see VMwere's 
Join the VMware's Customer Experience Improvement Program (CEIP) 
CANCEL 
BACK 
NEXT
  • L’assistant vous indique le résumé de votre upgrade et vous devez cocher la case comme quoi vous avez effectuez un backup de votre vCenter avant le lancement du process.
vCenter Server Installer 
Installer 
2 
3 
4 
S 
Upgrade - Stage 2: vCenter Server 
Introduction 
Connect to source vCenter Sem 
Select upgrede data 
Configure CEIP 
Reedy to complete 
Ready to complete 
Review settings before completing the wizard. 
Source vCenter Server with embedded PSC 
FQDN or IP address 
Version 
vlab-vcse01_vleb.com 
6.5 
Target Center Server with embedded PSC 
FQDN or IP address (temporery) 
FQDN or IP address (post-upgrade) 
Version 
Upgrade Data 
Dete to copy 
Size 
vlab-vcse01_vleb.com 
700.10300 
Configuration only 
l_8S GS 
Customer Experience Improvement Program 
CEIP setting 
Opted in 
I have backed up the source vCenter Server and all the required data from the 
database. 
CANCEL 
BACK 
FINISH
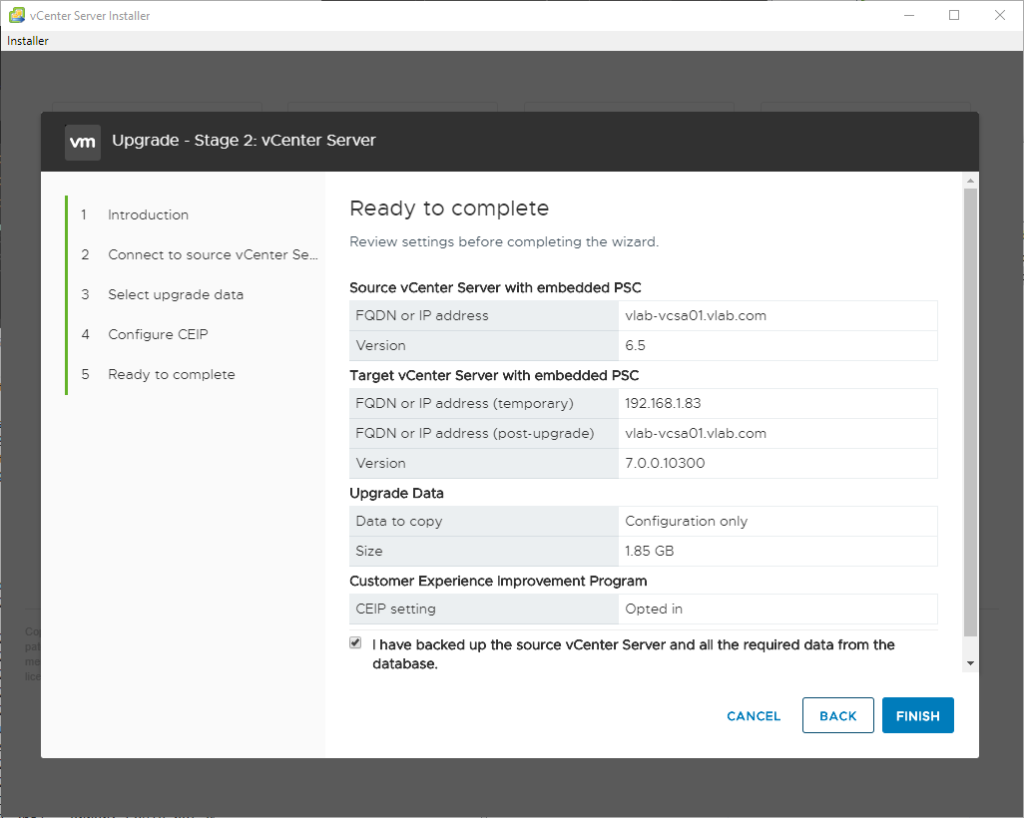
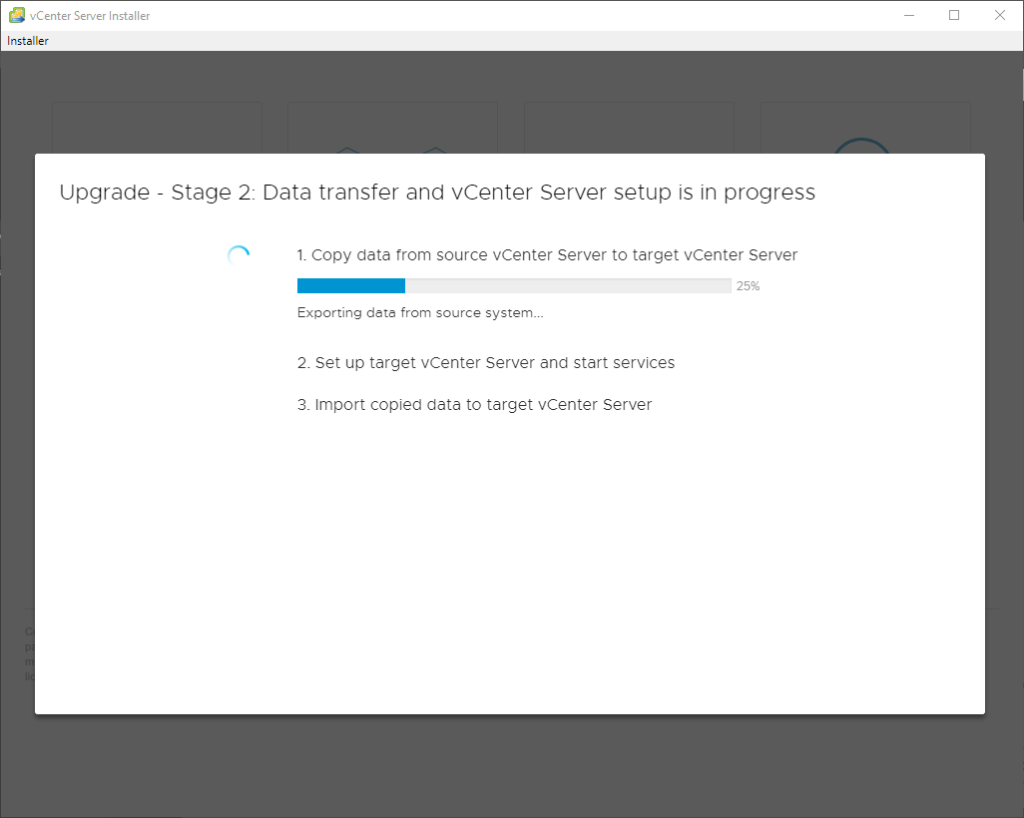
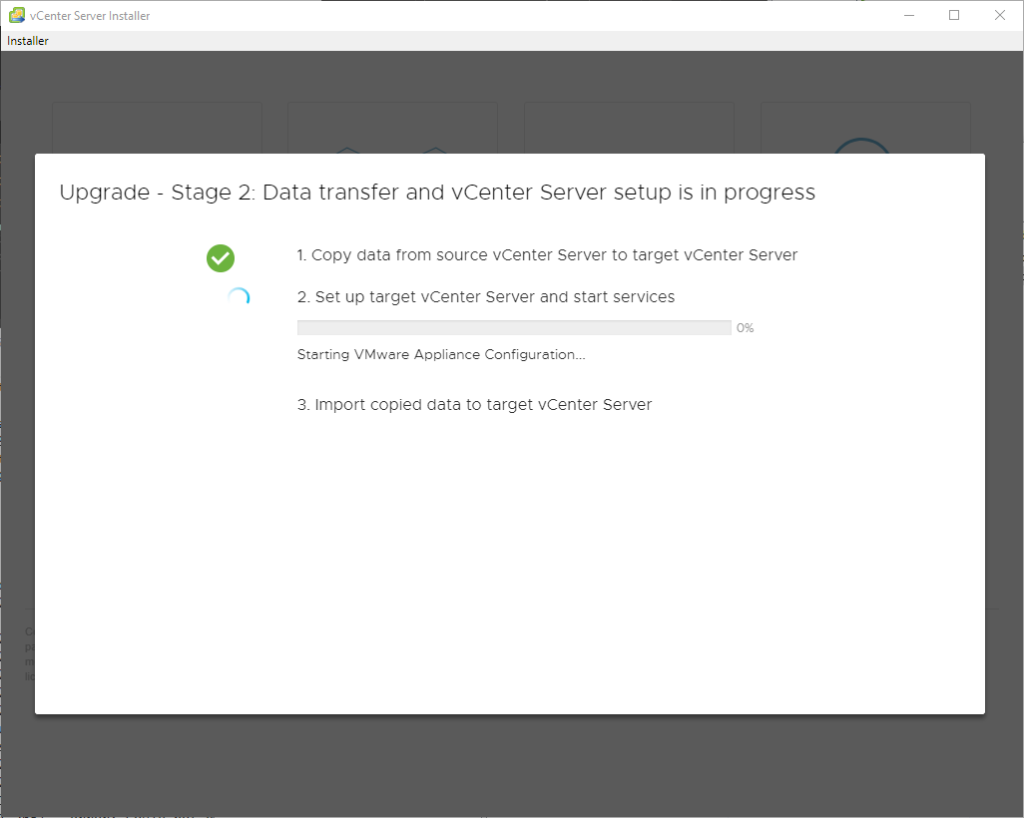
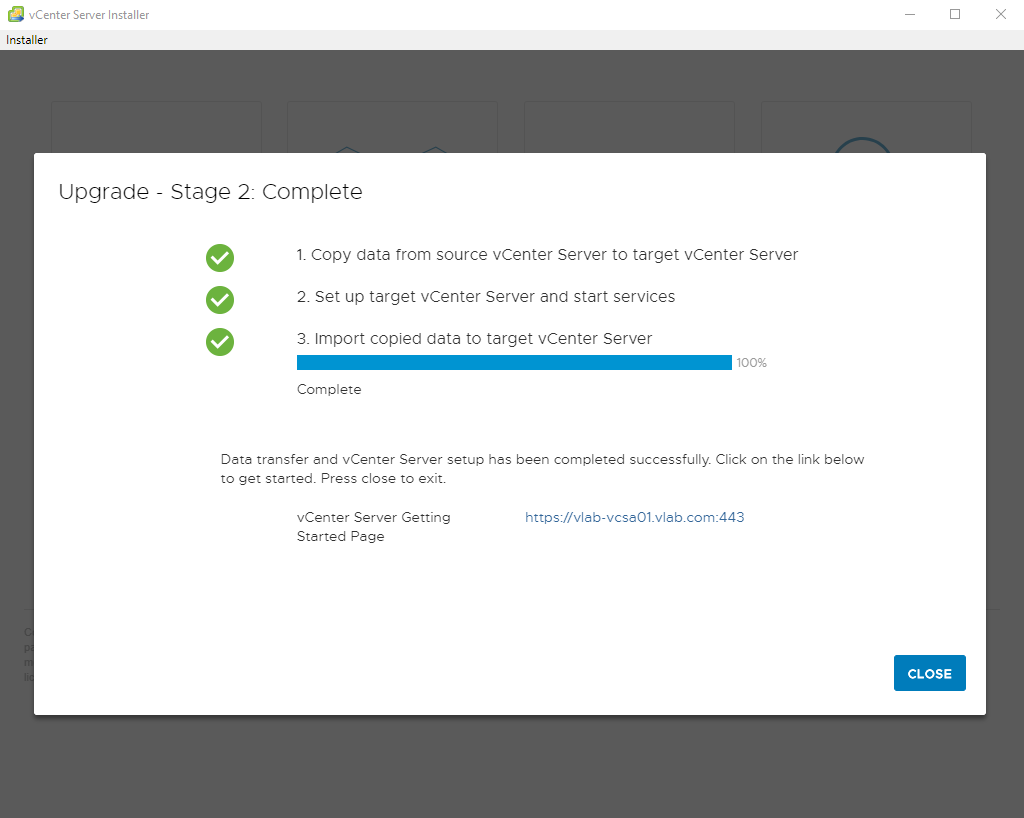
  • Une fois cliqué sur Finish le process est lancé, il n’y a plus qu’à aller se servir un café 😉
vCenter Server Installer 
Installer 
Upgrade 
Stage 2: Data transfer and vCenter Server setup is in progress 
1. Copy data trom source vCenter Server to target vCenter Server 
25% 
Exporting dete from source system_._ 
2. Set up target vCenter Server and start services 
3. Import copied data to target vCenter Server
vCenter Server Installer 
Installer 
Upgrade 
Stage 2: Data transfer and vCenter Server setup is in progress 
1. Copy data trom source vCenter Server to target vCenter Server 
2. Set up target vCenter Server and start services 
Starting VMwere Appliance Configuration.. 
3. Import copied data to target vCenter Server
vCenter Server Installer 
Installer 
Upgrade 
Messages 
Information 
i 
Information 
i 
vSphere 7.0 disables the TLS 1.0 end TLS 1.1 protocols 
for improved security Note: Some applicetions might 
support only the older protocols. To revert to the less 
secure TLS 1.0 and TLS 1.1 protocols, run the TLS 
Reconfigurator tool. Tool locetion: vCenter Server 
Appliance: /usr/lib/vmwere- 
TlsReconfigurator/VcTlsReconfigurator See 
https://kb_vmwere.com/kb/2147469 for details. 
If using Auto Deploy, update the DHCP settings and 
update the TFTP settings with the new set of tramp files 
from the new Auto Deploy server. 
CLOSE
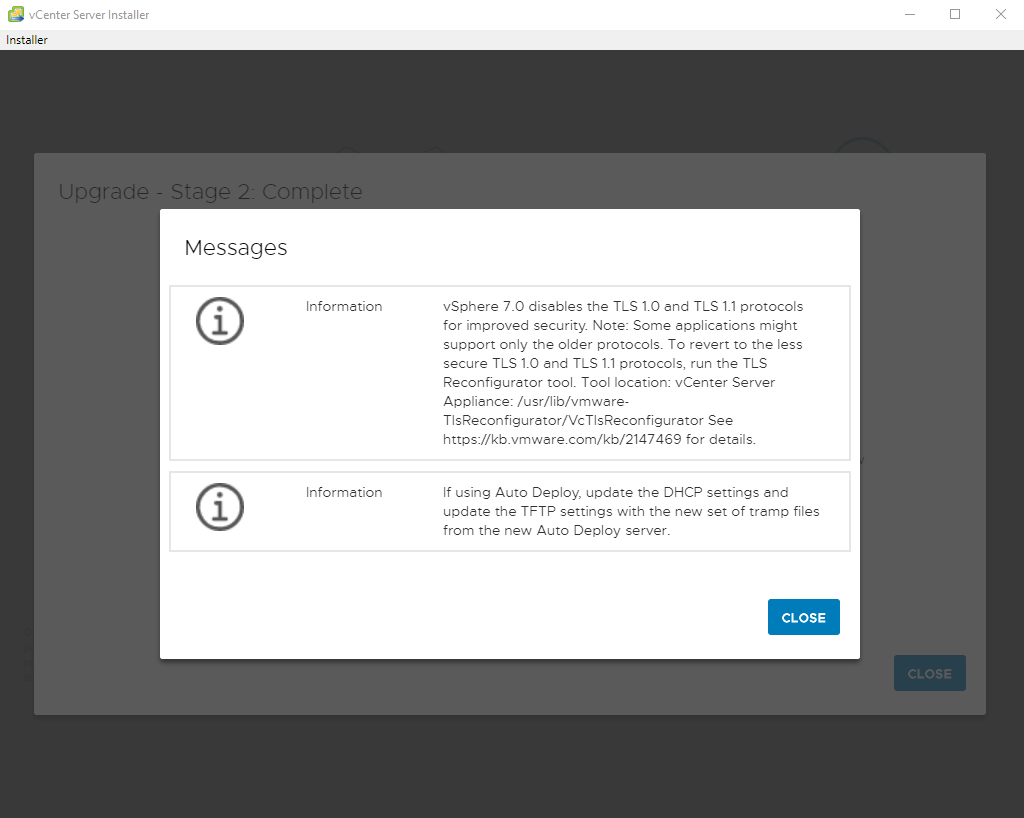
  • L’étape 2 est finie et vous pouvez vous connecter sur votre vCenter de nouveau qui est maintenant en vSphere 7!
vCenter Server Installer 
Installer 
Upgrade 
Stage 2_ Complete 
1. Copy data trom source vCenter Server to target vCenter Server 
2. Set up target vCenter Server and start services 
3. Import copied data to target vCenter Server 
100% 
Complete 
Data trensfer end vCenter Server setup hes been completed successfully. Click on the link below 
to get started. Press close to exit. 
vCenter Server Getting 
Started Page 
https://vlab-vcse01_vleb.com:443 
CLOSE
  • J’en ai profité pour passer mon UI en dark mode (fonctionnalité introduite en 6.7 Update 1)

Pour conclure la migration est vraiment très simple et VMware a bien travaillé sur son process afin de nous demander le moins d’efforts possible.

Les étapes suivantes (non couvertes dans ce post) :

  • Upgrade les ESXi en 7.0: il y a plusieurs méthodes, mais une méthode intéressante est l’utilisation du Lifecycle Manager (Anciennement Update Manager)
  • (Non obligatoire mais conseillé) Upgrade le niveau hardware des VMs
  • (Non obligatoire mais conseillé) Upgrade les VMware tools

Vous aimerez aussi...

Leave a Reply

Your email address will not be published. Required fields are marked *